If you are planning to sell products online and want full control over your store without paying heavy monthly platform fees, WooCommerce is one of the smartest choices you can make. Built on top of WordPress, it powers over 4.17 million active online stores worldwide, making it the most widely used eCommerce platform on the internet.
But the challenge most new store owners face when they start to set up a WooCommerce store which involves many moving parts. From installing the plugin to configuring payments, shipping, taxes, and SEO, every step matters. Miss one, and your store could lose sales, frustrate customers, or fail to rank on Google.
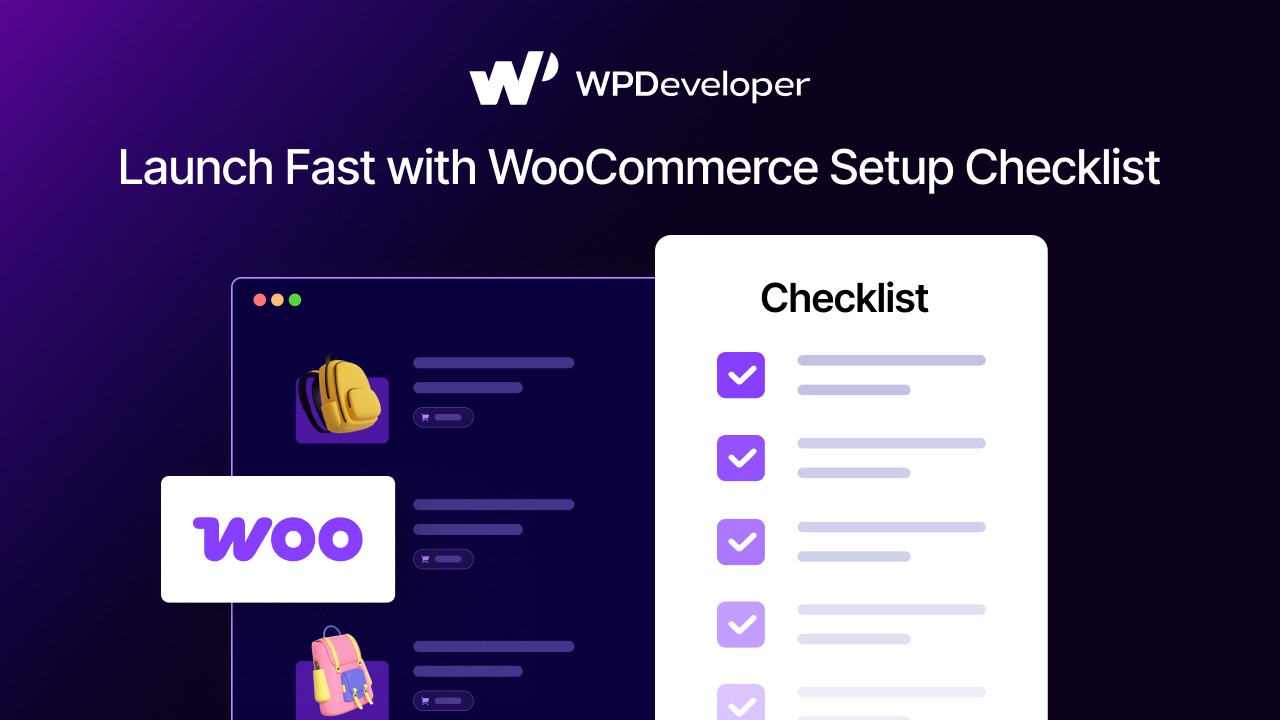
This WooCommerce store setup checklist is built to help you get your online shop live quickly, correctly, and without missing anything critical. Whether you are a first-time entrepreneur or a web developer launching a client store, this guide walks you through every essential step in a clear, logical order.
TL;DR: WooCommerce Store Setup Checklist at a Glance
Too long? Didn’t read? Here is a quick summary of the post and WooCommerce setup checklist.
StepActionPriority1Choose a reliable hosting providerCritical2Install WordPress and WooCommerceCritical3Select and configure your themeHigh4Set up store details and currencyCritical5Configure payment gatewaysCritical6Set up shipping zones and ratesCritical7Configure tax settingsHigh8Add your productsCritical9Set up essential pagesHigh10Install must-have pluginsHigh11Optimize for SEOHigh12Test the store before launchCritical13Launch and monitor performanceHigh
WooCommerce Store Setup Checklist to Launch Your Online Shop Fast
Now, without any further delay, let us go through the WooCommerce store setup checklist to launch your online shop fast.
1. Choose the Right Hosting for Your WooCommerce Store
The foundation of a successful WooCommerce store setup starts long before you install any plugin. Your hosting provider directly affects your site speed, uptime, and overall customer experience.
WooCommerce is a self-hosted platform, which means you need a web hosting account to run it. Not all hosting is created equal, especially for eCommerce.
What to Look for in WooCommerce Hosting
You need hosting that offers at least 2GB of RAM, PHP 8.0 or higher, MySQL 8.0 or MariaDB 10.6, and a content delivery network (CDN) option.
Managed WordPress hosting providers like xCloud, WP Engine, etc., are popular among WooCommerce merchants because they optimize their servers specifically for WordPress performance.
A good rule of thumb: if you are expecting fewer than 1,000 visitors per month, a shared hosting plan works fine. For growing stores, a managed hosting plan like xCloud or VPS is a better long-term investment.
Practical insight: Site speed is a direct ranking factor for Google. A store that loads in under 2 seconds has a significantly better chance of ranking on the first page than one that takes 5+ seconds. According to Google’s research, as page load time increases from 1 to 3 seconds, the probability of a mobile visitor bouncing increases by 32%.
2. Install WordPress And the WooCommerce Plugin
Once your hosting is ready, the next step is installing WordPress and activating WooCommerce. Most hosting providers offer a one-click WordPress installation through cPanel or their custom dashboard.
Installing WordPress
Log in to your hosting control panel, find the WordPress installer, and follow the on-screen steps. Choose your domain, set an admin username and strong password, and complete the installation.
Installing WooCommerce
After WordPress is installed, log into your WordPress dashboard at yourdomain.com/wp-admin. Then go to Plugins > Add New, search for “WooCommerce,” and click Install Now. Once installed, click Activate.
WooCommerce will then launch a setup wizard. This wizard helps you configure your store location, industry, product type, and business details. You can also choose to install recommended extensions here, but be selective. Installing too many plugins at the start can slow your site down.
3. Select And Configure a WooCommerce-Compatible Theme
Your theme controls how your store looks and feels. A poorly coded theme can break WooCommerce functionality, slow down your site, or create a confusing shopping experience.
Choosing the Right WooCommerce Theme
There are thousands of WooCommerce-compatible themes available, but not all of them are optimized for speed and conversions. When selecting a theme, look for the following qualities:
Explicitly labeled as WooCommerce-compatible
Lightweight and fast-loading (test with Google PageSpeed Insights)
Mobile-responsive and touch-friendly
Regularly updated by the developer
Positive reviews from real users
Apart from the popular free options for themes, you can also use WooCommerce-compatible templates from Templately, which seamlessly work with any of the latest WordPress themes.
Configuring the Theme
After installing your theme, if you need any customizations, then go to Appearance > Customize to set your logo, brand colors, fonts, header layout, and homepage design. Make sure your header clearly shows your store name and navigation. Your footer should include links to your privacy policy, terms, and contact page.
4. Configure Your WooCommerce Store Settings
This is one of the most critical steps in your WooCommerce store setup checklist. Go to WooCommerce > Settings to access the core configuration panel.
General Settings
Start with the ‘General’ tab. Set your store address, selling location (which countries you sell to), and shipping location. These settings affect tax calculations and shipping rates, so accuracy is essential.
Under “Currency options,” select your currency, its position (before or after the number), and decimal separator. For example, if you are selling in Bangladesh, set the currency to BDT (Taka) and adjust the decimal display accordingly.
Account And Privacy Settings
Under the ‘Accounts and Privacy’ tab, decide whether customers need to register an account to purchase or whether guest checkout is allowed. Enabling guest checkout typically increases conversion rates because it removes friction from the buying process.
According to a Baymard Institute study, “forced account creation” is one of the top reasons shoppers abandon their carts.
5. Set Up WooCommerce Payment Gateways
Your payment gateway is how money moves from your customer’s wallet to your bank account. Getting this right is non-negotiable for launch.
WooCommerce supports a wide range of payment options through native integrations and extensions. The default installation includes WooCommerce Payments, PayPal, direct bank transfer (BACS), and cash on delivery.
Popular Payment Gateways for WooCommerce
Stripe is the most widely recommended gateway for international merchants. It supports credit cards, debit cards, Apple Pay, Google Pay, and local payment methods in many countries. The WooCommerce Stripe plugin is free, and Stripe charges around 2.9% + $0.30 per successful card transaction in the US (rates vary by country).
PayPal remains a trusted option for many buyers. Adding PayPal gives hesitant shoppers a familiar, secure checkout experience. It works especially well for digital products and cross-border sales. Local payment gateways matter if you are targeting specific markets.
How to Add a Payment Gateway
Go to ‘WooCommerce’ > ‘Settings’ > ‘Payments’. You will see a list of available gateways based on your business location. You need to install and proceed to “Set up” next to the one you want to enable, enter your account credentials (API keys), and save. Always run a test transaction using a sandbox or test mode before going live.
6. Configure Shipping Zones, Methods, and Rates
Shipping is one of the most common setup mistakes new WooCommerce store owners make. Incorrect shipping configurations lead to either overcharging customers (which kills conversions) or losing money on every order.
Setting Up Shipping Zones
Go to ‘WooCommerce’ > ‘Settings’ > ‘Shipping’. A shipping zone is a geographic region where you apply specific shipping methods and rates. For example, you might create one zone for your home country and another for international orders. Follow the steps mentioned in this documentation to set up shipping zones.
Click “Add shipping zone,” name it (e.g., “Denmark”), select the regions it covers, and then add shipping methods to that zone. Common methods include:
Flat rate: Charge a fixed fee regardless of order size
Free shipping: Offer free delivery, often conditional on a minimum order amount
Local pickup: Allow customers to collect orders in person
Calculating Shipping Costs
If your shipping costs vary by weight or dimensions, install the WooCommerce shipping class feature and assign classes to your products. For stores that ship frequently, integrating with a carrier like FedEx, UPS, or DHL through official plugins gives you real-time rate calculation at checkout.
Practical tip: Offering free shipping above a certain order value is a proven way to increase average order value. Research from NRF/FTI Consulting has consistently shown that free shipping remains the top factor driving online purchase decisions.
7. Configure Tax Settings Correctly
Tax configuration in WooCommerce is often the most confusing part for new store owners. Getting it wrong can create legal and accounting problems down the line.
Enabling Tax Calculations
Go to WooCommerce > Settings > General and check the box labeled “Enable tax rates and calculations.” Once enabled, a new Tax tab will appear in your settings.
Source: WooCommerce
Tax Configuration Options
Under the Tax tab, you will find options for tax calculation method (based on customer shipping address, billing address, or store base address), whether to display prices inclusive or exclusive of tax, and how taxes are shown in the cart and at checkout.
Source: WooCommerce
You can then create tax classes and set specific rates. For example, in many countries, there is a standard rate that applies to most goods and a reduced rate for essentials like food or medicine. Follow, this step-by-step documentation to learn in details about how to configure tax settings in WooCommerce.
If you are selling internationally or in multiple US states, consider using an automated tax plugin like TaxJar or Avalara to keep up with constantly changing tax laws without manual updates.
8. Add Your Products to WooCommerce
Now comes the part most store owners are most excited about: adding products. WooCommerce supports several product types: simple, variable, grouped, external/affiliate, and virtual or downloadable products.
Adding a Simple Product
Go to Products > Add New. Give your product a name, write a detailed description, and add a short description that appears near the product image. Upload high-quality product images and add them to the product gallery. Use consistent image dimensions across all products to create a cleaner shopping experience and avoid layout shifts.
Source: WooCommerce
In the “Product data” box below the description, set the price, manage inventory, configure shipping details (weight, dimensions), and link related products.
Writing SEO-Optimized Product Descriptions
Each product description is a ranking opportunity. So, make sure to,
Include your main keyword naturally in the first 100 words.
Describe the product’s benefits, not just its features.
Use short paragraphs and answer questions a customer might have before buying.
For variable products (like a t-shirt in multiple colors and sizes), use the “Variable product” type and create attributes (Color, Size) and variations with individual prices and stock levels for each combination.
Managing Inventory
Go to the Inventory tab inside each product and enable stock management. Set the stock quantity, and choose what happens when stock runs out, whether WooCommerce should prevent purchases or allow backorders. Turn on low stock notifications under WooCommerce > Settings > Products > Inventory so you never run out of stock unexpectedly.
9. Create Essential Pages for Your WooCommerce Store
WooCommerce automatically creates the Cart, Checkout, My Account, and Shop pages during installation. Beyond these, your store needs several additional pages to appear professional and trustworthy.
Pages You Must Create Before Launch
About Us page: Tells your brand story and builds trust with first-time visitors. Stores with strong “About” content see higher trust and lower bounce rates.
Contact page: Include a contact form, email address, phone number, and physical address if applicable. A visible contact method significantly increases buyer confidence.
Privacy Policy page: This is legally required in most countries, including under GDPR (Europe), CCPA (California), and similar regulations. WordPress has a built-in Privacy Policy page generator under Settings > Privacy.
Terms and Conditions page: Outlines the rules of purchasing from your store, including return and refund policies, legal disclaimers, and acceptable use conditions.
Shipping and Returns page: Clearly explain your delivery timeframes, carriers used, return window, and refund process. Ambiguous return policies are a major source of cart abandonment. Once created, link these pages in your footer navigation for easy access.
10. Install the Must-Have Plugins
Plugins extend WooCommerce functionality without requiring custom development. However, every plugin you add is a potential source of slowdown or conflict, so install only what you genuinely need.
Recommended Plugins for New Stores
Rank Math or Any SEO Plugin: RankMath handles on-page SEO for your store, including meta titles, meta descriptions, XML sitemaps, and structured data markup. Both have WooCommerce-specific features for product page optimization.
WooCommerce PDF Invoices and Packing Slips: Automatically generates and emails invoices to customers after purchase. Professional invoicing builds credibility and reduces support queries.
WPForms or Contact Form 7: Needed for your Contact Us page and any inquiry forms. WPForms has a dedicated order form template as well.
Google Site Kit: Connects your store to Google Analytics so you can track traffic sources, conversion rates, and product performance.
WooCommerce Cart Abandonment Recovery: Automatically emails customers who start checkout but do not complete their purchase. Studies show recovery emails can recapture 5–15% of abandoned carts.
Wordfence Security: Adds a firewall and malware scanning to protect your store and customer data.
11. Optimize Your WooCommerce Store for SEO
A beautiful, well-configured WooCommerce store means nothing if no one can find it. SEO is the long-term engine that drives organic traffic to your store without ongoing ad spend.
Technical SEO for WooCommerce
Here are some basic technical SEO tips for WooCommerce:
Start by setting up a clean URL structure. Go to Settings > Permalinks and select “Post name” as your permalink structure. This creates clean URLs like yourdomain.com/product/blue-sneakers rather than yourdomain.com/?p=123.
Install your SEO plugin and configure it to generate an XML sitemap. Submit this sitemap to Google Search Console so Google can discover and index your pages faster.
Enable breadcrumbs in your SEO plugin settings. Breadcrumbs appear at the top of product pages (e.g., Home > Clothing > T-Shirts > Blue Crew Tee) and help both users and search engines understand your site structure.
On-Page SEO for Product And Category Pages
Every product and category page should have a unique, keyword-focused meta title and meta description. Product categories often rank more easily than individual products for broad commercial keywords. Here is what you need to ensure,
The meta title should include your primary keyword and brand name.
The meta description should be compelling and under 160 characters, giving users a reason to click.
Add structured data (schema markup) to your product pages.
WooCommerce, combined with an SEO plugin, can automatically output Product schema that shows star ratings, price, and availability directly in Google search results, significantly increasing click-through rates.
Site Speed Optimization
Page speed is both a user experience issue and an SEO ranking factor. To optimize speed, you can do the following things
Install a caching plugin like WP Rocket or LiteSpeed Cache to serve cached versions of your pages to returning visitors.
Compress and optimize all product images using a plugin like Imagify or ShortPixel.
Use a CDN to serve assets faster to visitors in different geographic locations.
Also, while optimizing your WooCommerce store for SEO, make sure to avoid these WooCommerce SEO mistakes for a better outcome.
12. Test Your WooCommerce Store Before Launch
Testing is the step most store owners rush through and it is often the source of costly post-launch problems. Before going live, conduct a thorough end-to-end test of every part of your store. Here is a pre-Launch testing checklist:
Payment testing: Enable test mode in your payment gateway (Stripe and PayPal both offer sandbox environments) and place a test order from start to finish. Confirm the order appears in your WooCommerce dashboard and the customer receives an order confirmation email. Test coupon codes, shipping calculations, taxes, and guest checkout to ensure customers experience the same workflow you intended.
Email notifications: Check all automated WooCommerce emails like, new order notification (to you), order confirmation (to customer), and account registration email. Go to WooCommerce > Settings > Emails to review and customize each template.
Mobile responsiveness: Open your store on a real smartphone (not just a browser emulator). Check the product pages, cart, and checkout on both Android and iOS. Mobile commerce accounts for over 60% of global eCommerce traffic, so this step is critical.
Cross-browser testing: Open your store in Chrome, Firefox, Safari, and Edge. Check that layouts, buttons, and checkout work correctly in each browser.
Broken links and 404 errors: Use a tool like Screaming Frog (free for up to 500 URLs) or the Broken Link Checker plugin to find and fix any broken links before launch.
Speed test: Run your store through Google PageSpeed Insights and GTmetrix. Aim for a score above 70 on mobile and above 85 on desktop.
13: Launch Your WooCommerce Store And Monitor Performance
Once testing is complete and you are confident everything works, it is time to go live. But launching is not the end; it is the beginning of an ongoing process. Make sure to follow the post-launch actions like,
Submit your sitemap to Google Search Console if you have not already done so.
Set up Google Analytics and verify that eCommerce tracking is working (you should see “eCommerce” reports with transaction data).
Connect your store to Google Merchant Center if you plan to run Google Shopping ads.
Announce your launch on social media, to your email list, and in any relevant communities.
If you have a budget for advertising, a small Google Shopping or Meta ads campaign during the first few weeks can drive early traffic and sales while your SEO builds momentum.
Check your WooCommerce reports weekly to track revenue, top products, and conversion rate.
Monitor Google Search Console for crawl errors, manual actions, or new keyword rankings.
Review customer feedback and support queries to identify friction points in the buying experience.
Set up stock notifications so you are never caught with an out-of-stock item, driving traffic from your SEO efforts. The first 90 days after launch are critical for identifying and fixing issues before they become habits.
Launch Your WooCommerce Store Correctly for Long-Term Success
Setting up a WooCommerce store is a multi-step process, but it becomes much more manageable when you follow a clear, structured checklist. By covering hosting, installation, payments, shipping, taxes, products, SEO, and testing in the right order, you give your store the best possible foundation for long-term success.
The steps in this WooCommerce store setup checklist are not just about getting your store live, they are about getting it live correctly. A well-configured store converts better, ranks higher on Google, and delivers a shopping experience that keeps customers coming back.
If you are just getting started, work through each section in order. If you already have a store that is underperforming, use this checklist as an audit tool to identify what might be missing or misconfigured. The right setup takes a few hours of careful work. The results of a professional, fast, and fully functional online shop are absolutely worth the effort.
If you have found this blog on the WooCommerce setup checklist helpful, feel free to share your thoughts in our Facebook community. You can also subscribe to our blog for useful tutorials, guides, knowledge, tips, and the latest WordPress updates.
Frequently Asked Questions About How to set up a WooCommerce store
1. How long does it take to set up a WooCommerce store?
A basic WooCommerce store with a few products, a payment gateway, and standard shipping can be set up in 4 to 8 hours if you follow a structured checklist. Stores with many products, complex shipping rules, or custom design work may take several days. Using a pre-built WooCommerce theme and following a step-by-step setup process significantly speeds up the timeline.
2. Is WooCommerce free to use?
The WooCommerce plugin itself is free and open-source. However, running a WooCommerce store does involve costs. You will need to pay for web hosting (typically $5 to $50 per month, depending on your plan), a domain name (around $10 to $15 per year), and possibly a premium theme or paid plugins. Payment gateways also charge per-transaction fees. Overall, WooCommerce is significantly more affordable than hosted platforms like Shopify for most store sizes.
3. Do I need coding knowledge to set up WooCommerce?
No. WooCommerce is designed for non-developers and can be fully configured through its admin dashboard without writing a single line of code. However, basic familiarity with WordPress is helpful. For advanced customizations — like custom checkout fields or complex integrations — some PHP or CSS knowledge is useful, or you can hire a WooCommerce developer.
4. What is the best payment gateway for WooCommerce?
Stripe is widely considered the best all-around payment gateway for WooCommerce. It supports major credit and debit cards, digital wallets like Apple Pay and Google Pay, and over 135 currencies. PayPal is a strong secondary option that many customers already trust. For region-specific markets, local gateways like bKash (Bangladesh), Razorpay (India), or Mollie (Europe) may be more relevant depending on your customer base.
5. How do I make my WooCommerce store rank on Google?
To rank your WooCommerce store on Google, focus on technical SEO (clean URLs, fast loading speed, mobile responsiveness), on-page SEO (keyword-optimized product and category page titles, descriptions, and schema markup), and content marketing (a blog that targets search queries your potential customers use). Install an SEO plugin like Rank Math or Yoast SEO, submit your sitemap to Google Search Console, and build backlinks by getting your store mentioned on relevant websites and directories.
6. Can WooCommerce handle a large number of products?
Yes. WooCommerce can technically handle thousands of products, but performance at scale depends heavily on your hosting environment. For stores with more than 1,000 products or high traffic volumes, you need a managed WordPress hosting plan with sufficient server resources, a well-optimized database, and server-side caching. For very large catalogs (10,000+ products), a VPS or dedicated hosting environment is recommended.
The post WooCommerce Store Setup Checklist to Launch Your Online Shop Fast appeared first on WPDeveloper.
Leave a Reply